
Page 8 - Tennessee 811 Magazine 2022 Issue 3
P. 8
By Jason Kouba
Damage Prevention Liaison Tennessee811
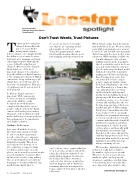
Don’t Trust Words, Trust Pictures
Technology in locating has changed drastically in the last 10-15 years. Ticket management software, ticket routing, locate equipment with the ability to get accurate location information for mapping, and many other improvements. Although the science behind locating has not changed, efficiencies have changed. In my mind, one of the most important changes to locating has been the addition of digital cameras to the equipment being used. Digital cameras are cheap, and most people always have one in their pocket in the form of a smartphone. This piece of equipment can be a great asset if used properly.
So why are digital cameras so important? Well, cameras give locators, excavators, and utility owners the ability to easily document the work they have completed. In this article, we are going to talk about how the digital camera can benefit you, no matter what part of the workflow you fall under, and how you can properly use this equipment for documentation and claims resolution.
Guidance for Locators
Let’s start off with the locators.
In today’s environment, it would
be safe to say that a majority, if
not all, contract locate companies
are documenting their work using digital photography. The photos
are being used to show proof of
job completion, to support claims resolution, and in some cases, the photos can be viewed by excavators who are performing the excavation. More and more we are also seeing utilities who are performing locates in-house beginning to document what is being marked using digital photos.
6 • Tennessee811 2022, Issue 3
So, as a locator, how do we make sure that we are capturing useful photographs of our locates?
Your photographs must be taken intentionally, meaning that we aren’t just snapping random pictures from
When I was locating, this is the system that worked best for me. We wore safety vests while performing locates, as most locators do, and I would carry my small digital camera in the chest pocket of my safety vest. While marking a utility out,
I would always use dots as I was walking away from the transmitter. Once I reached the end of the locate area and verified that the dots were placed on the target facility, I would walk back toward the transmitter making my solid lines and placing flags. By using dots on the way
out, I was able to have a target point to angle my marks coming back, basically playing connect the dots. This made for a cleaner line, especially when there are turns and bends in the underground facility. As I am walking back and placing my solid lines and flags, I would stop every 10 to 20 feet, turn around, and standing directly over the line snap a picture of the locate marks I just placed. When taking this picture, I am making sure that I can clearly see the locate marks and there are permanent structures to reference in the photos. I would continue with this method until all facilities were marked, and when
I was finished, I could look at all
of those photos and basically walk through my locate just through
the photos. Of course, this isn’t the only way that pictures can be done, but it was what worked for me and minimized any additional steps when performing a locate.
The benefit to digital photographs is that you really have no limit to
the number of photos you can take. Therefore, be sure you get all your marks in a photo and pay special attention to anywhere a facility turns or bends along the locate path. One more important photograph to take
CONTINUED ON PAGE 14
one location to try to capture what has been located. Locate photos should be taken directly in line with the locate marks with permanent structures in the background. These structures
can be used as reference points if an incident happens, and no marks are remaining when the investigation is being completed. Your photos should tell a story.
